
This guide walks you through setting up a league on League2GO, from creating your account to publishing your first games. Each step links to a detailed article if you need more depth.
1. Create your account
Go to league2go.com and enter the requested information. One account is enough to be a manager or a player in several leagues. See your account for how accounts and logins work.
2. Create your league
Leagues are created on the website at league2go.com, not in the mobile app.
From the Leagues menu, click Create a league and enter the requested information:
- Sport: defines the available position configurations and the statistics that can be calculated after each game.
- League type: fixed teams or pick-up. You can change the type later in league settings if needed (switching to pick-up requires exactly two active teams). See league types.
- Positions: the positions players occupy in your sport. For hockey, that’s typically goalie, defense and forward (or center and wingers). Positions drive a lot of League2GO: the automatic substitute search only contacts substitutes who play the absent player’s position (a missing goalie is replaced by a goalie), and when you build your game lineups later, players are placed by position, including forward lines and defense pairs if you use them. See game day.
3. Add your teams
Two teams are automatically added to your league. To rename a team or change its color and logo, click its gear icon. If your league has more than two teams, use the Add a team button.
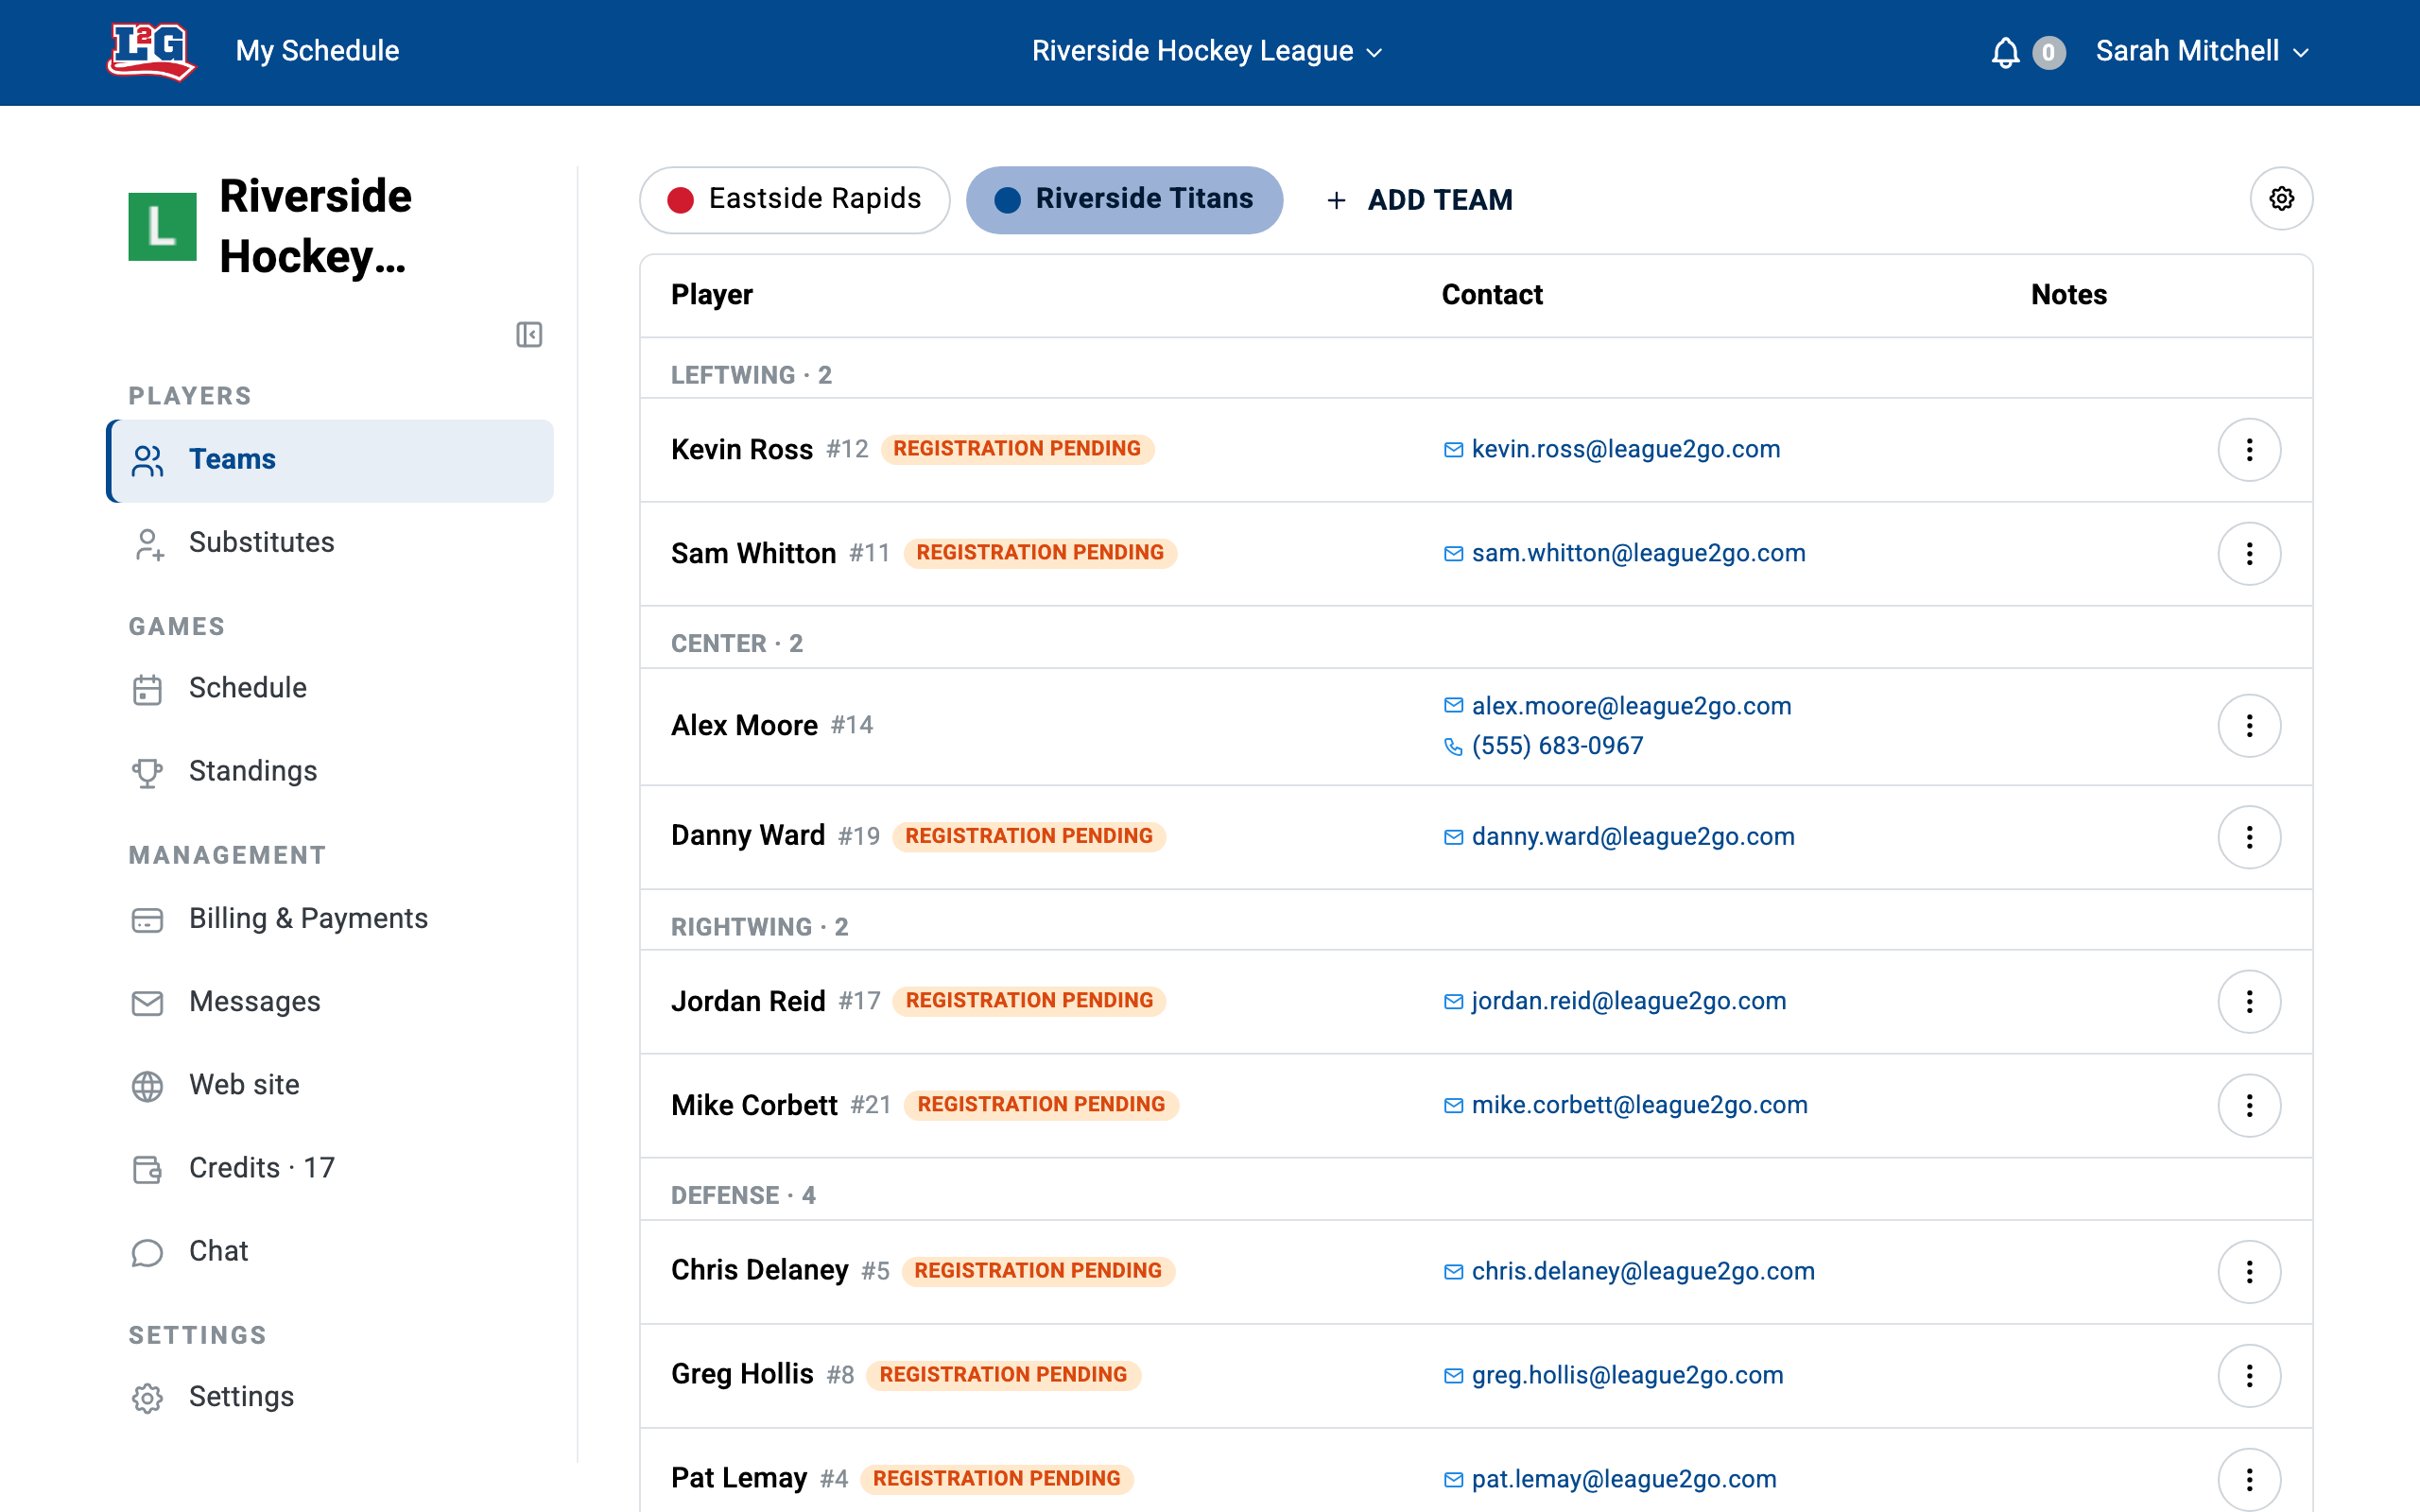
For captains, team colors, logos and other options, see teams and team settings.
4. Add your players
To add a player, click the Add player button at the bottom of a team card. Enter the player’s email address or cell number: the player uses exactly this information to sign in to League2GO, so double-check it. Once added, the player receives an automated message inviting them to complete their registration, which gives them access to the league schedule.
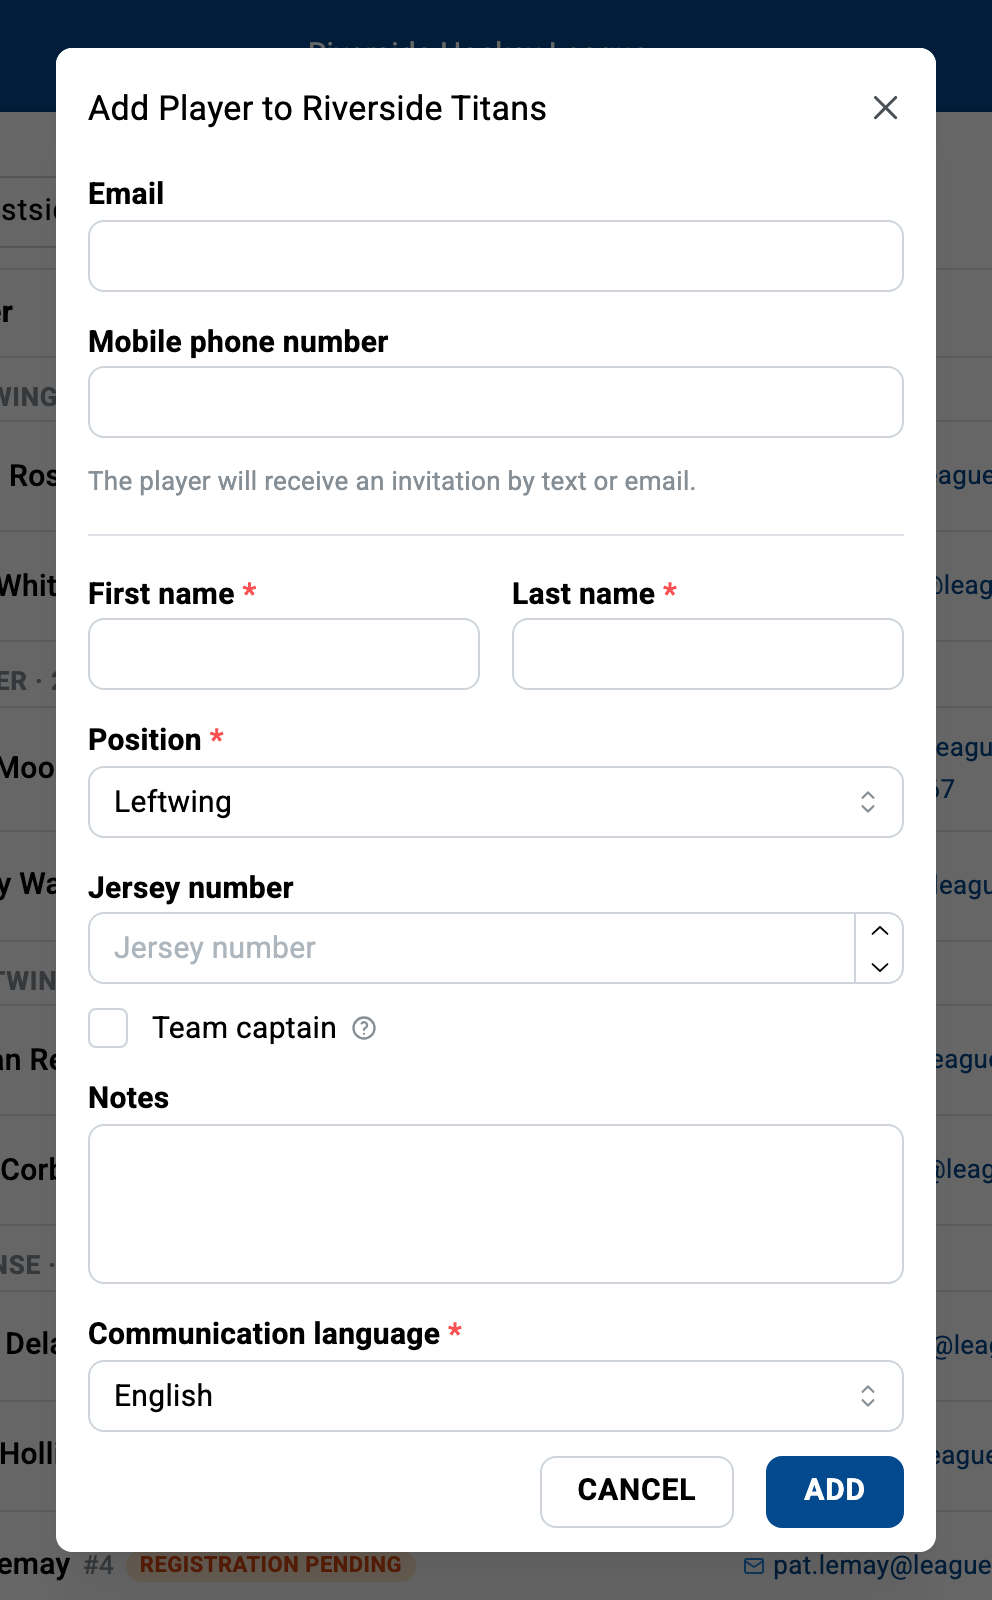
See adding players for the details, and managing players for what you can do afterwards.
5. Add your substitutes
In the Substitutes tab, add substitutes for a specific team, or league substitutes shared across all teams. Substitutes receive an invitation to register, then automatic requests when a player of their position declares an absence. Check every position a substitute can play so they are contacted as often as possible.
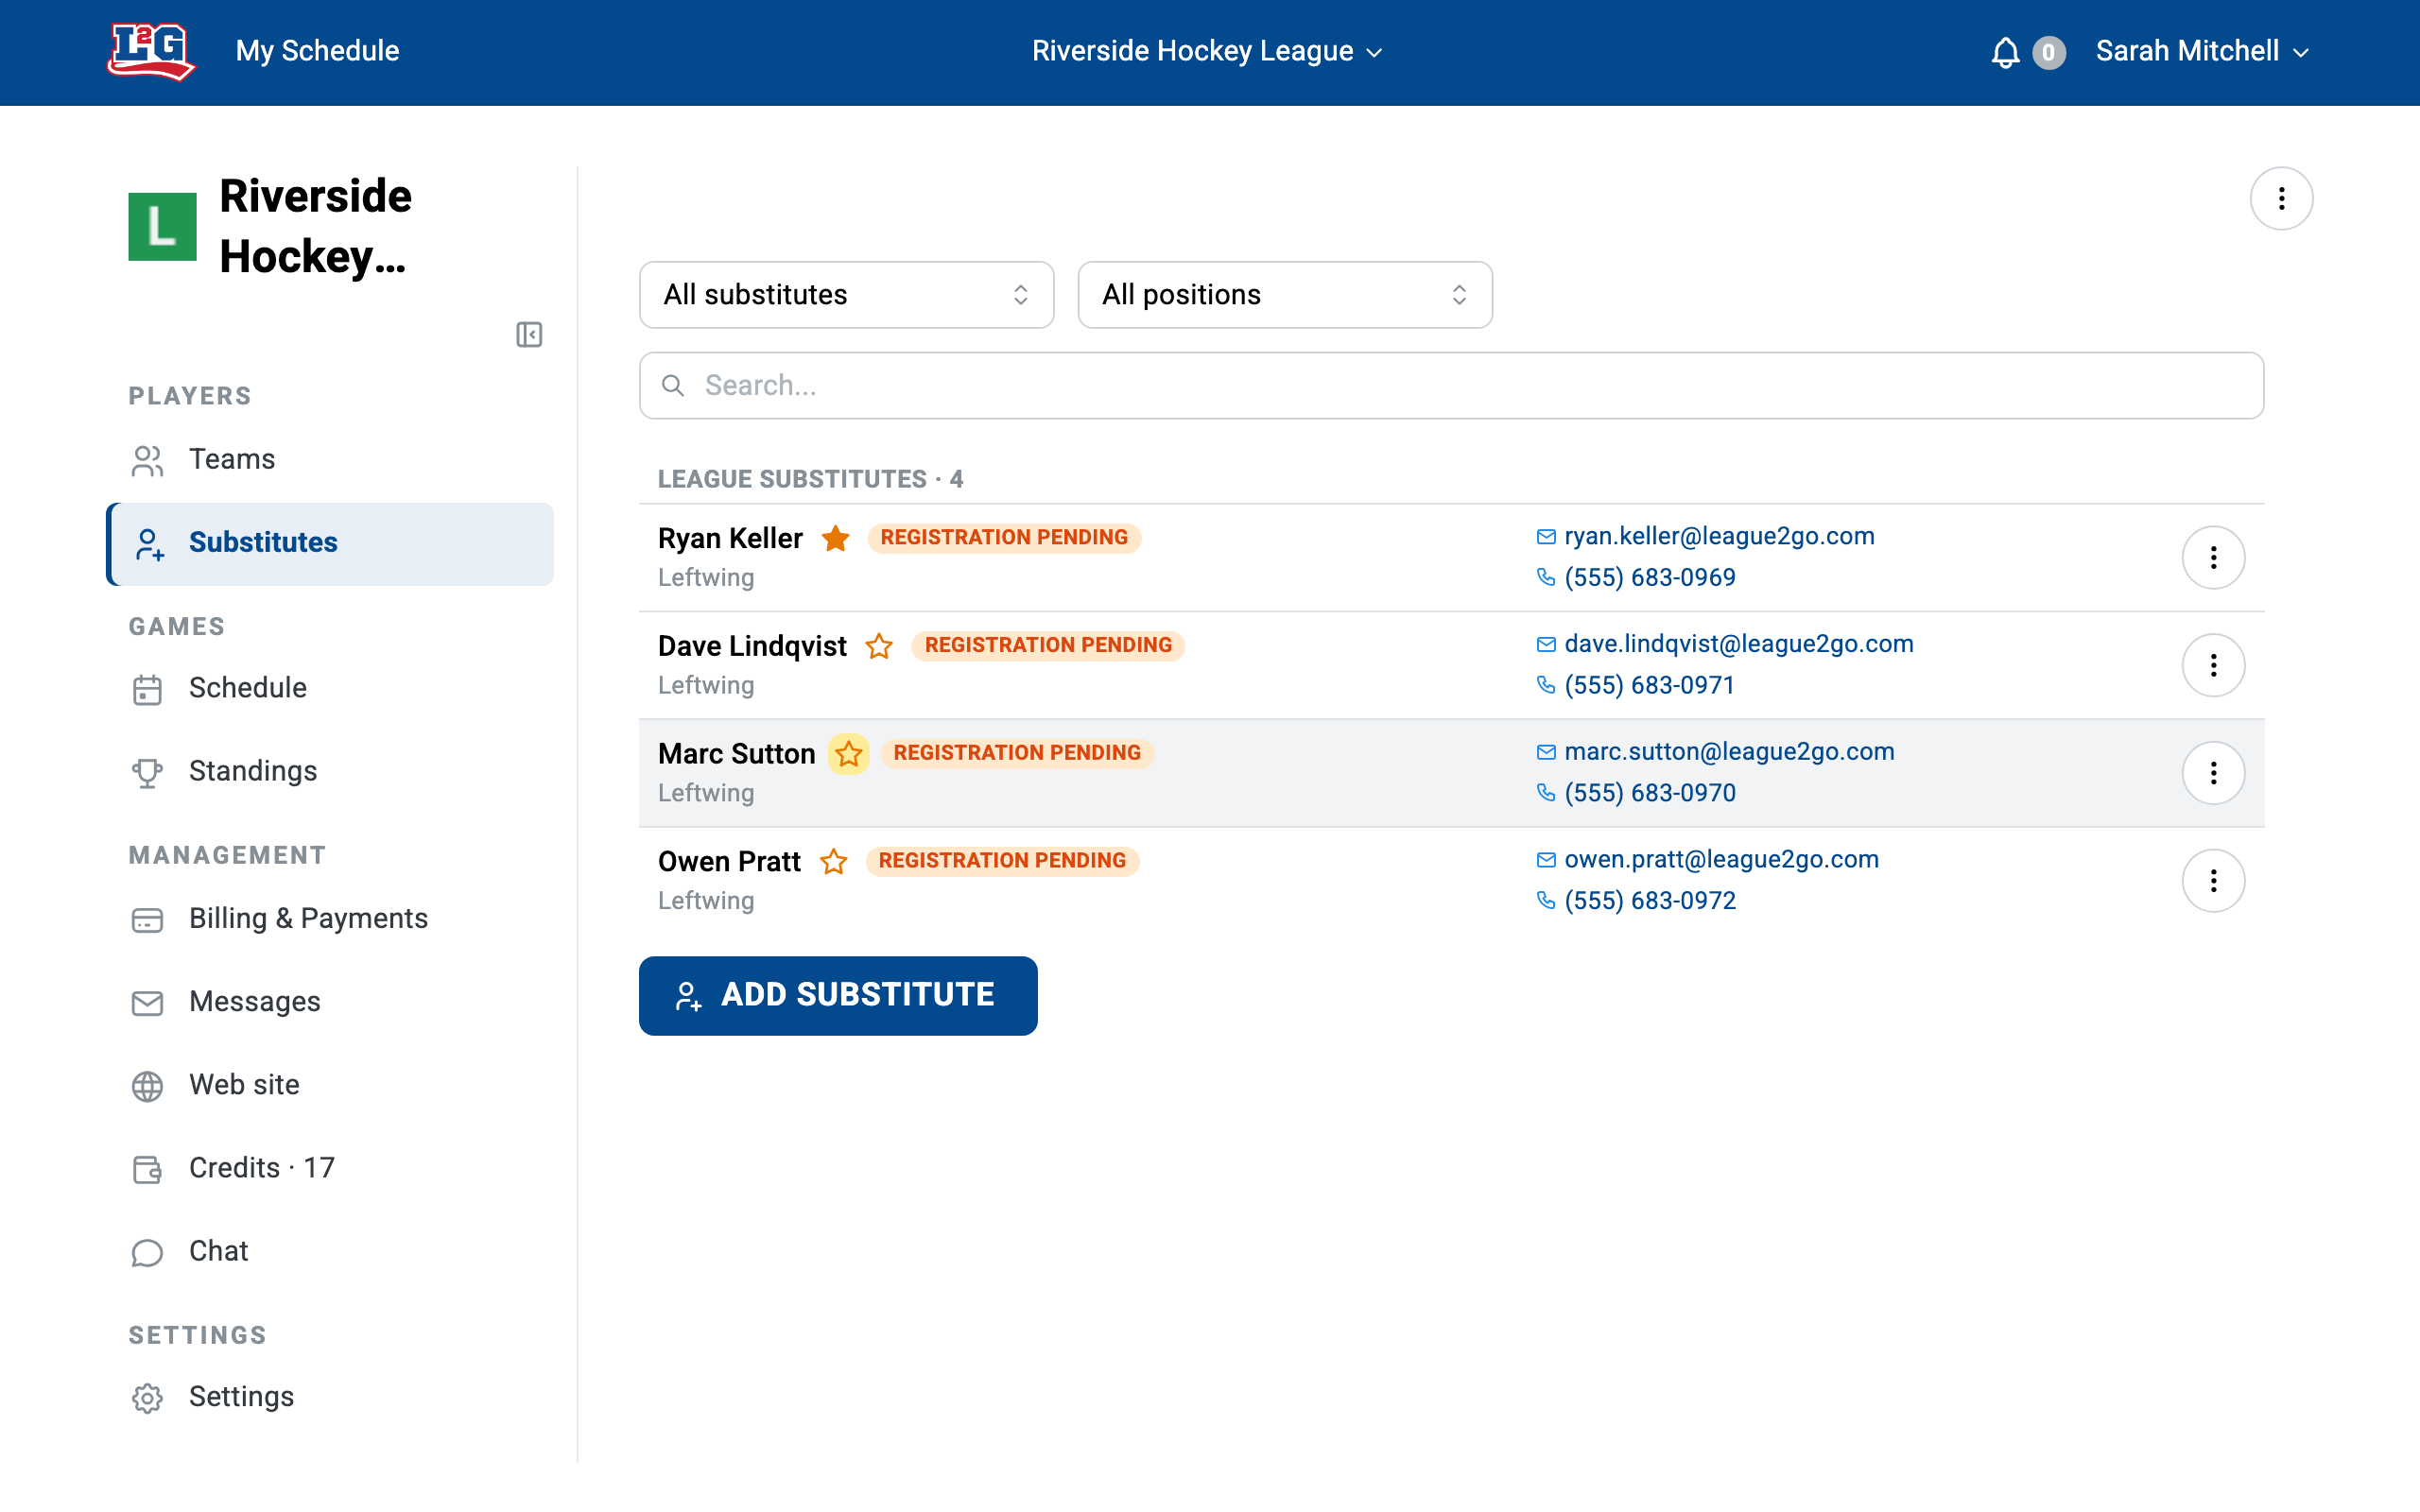
See managing substitutes and, to understand how the automatic search works, the substitute search overview.
6. Create your schedule
From the league calendar, click Add and enter the game information. If your games are weekly, use the repeat option to create multiple games with the same parameters in one step. Each game uses one game credit; if you run out, you can purchase more by logging in on the website. Purchasing game credits is not possible in the app. See pricing and game credits.
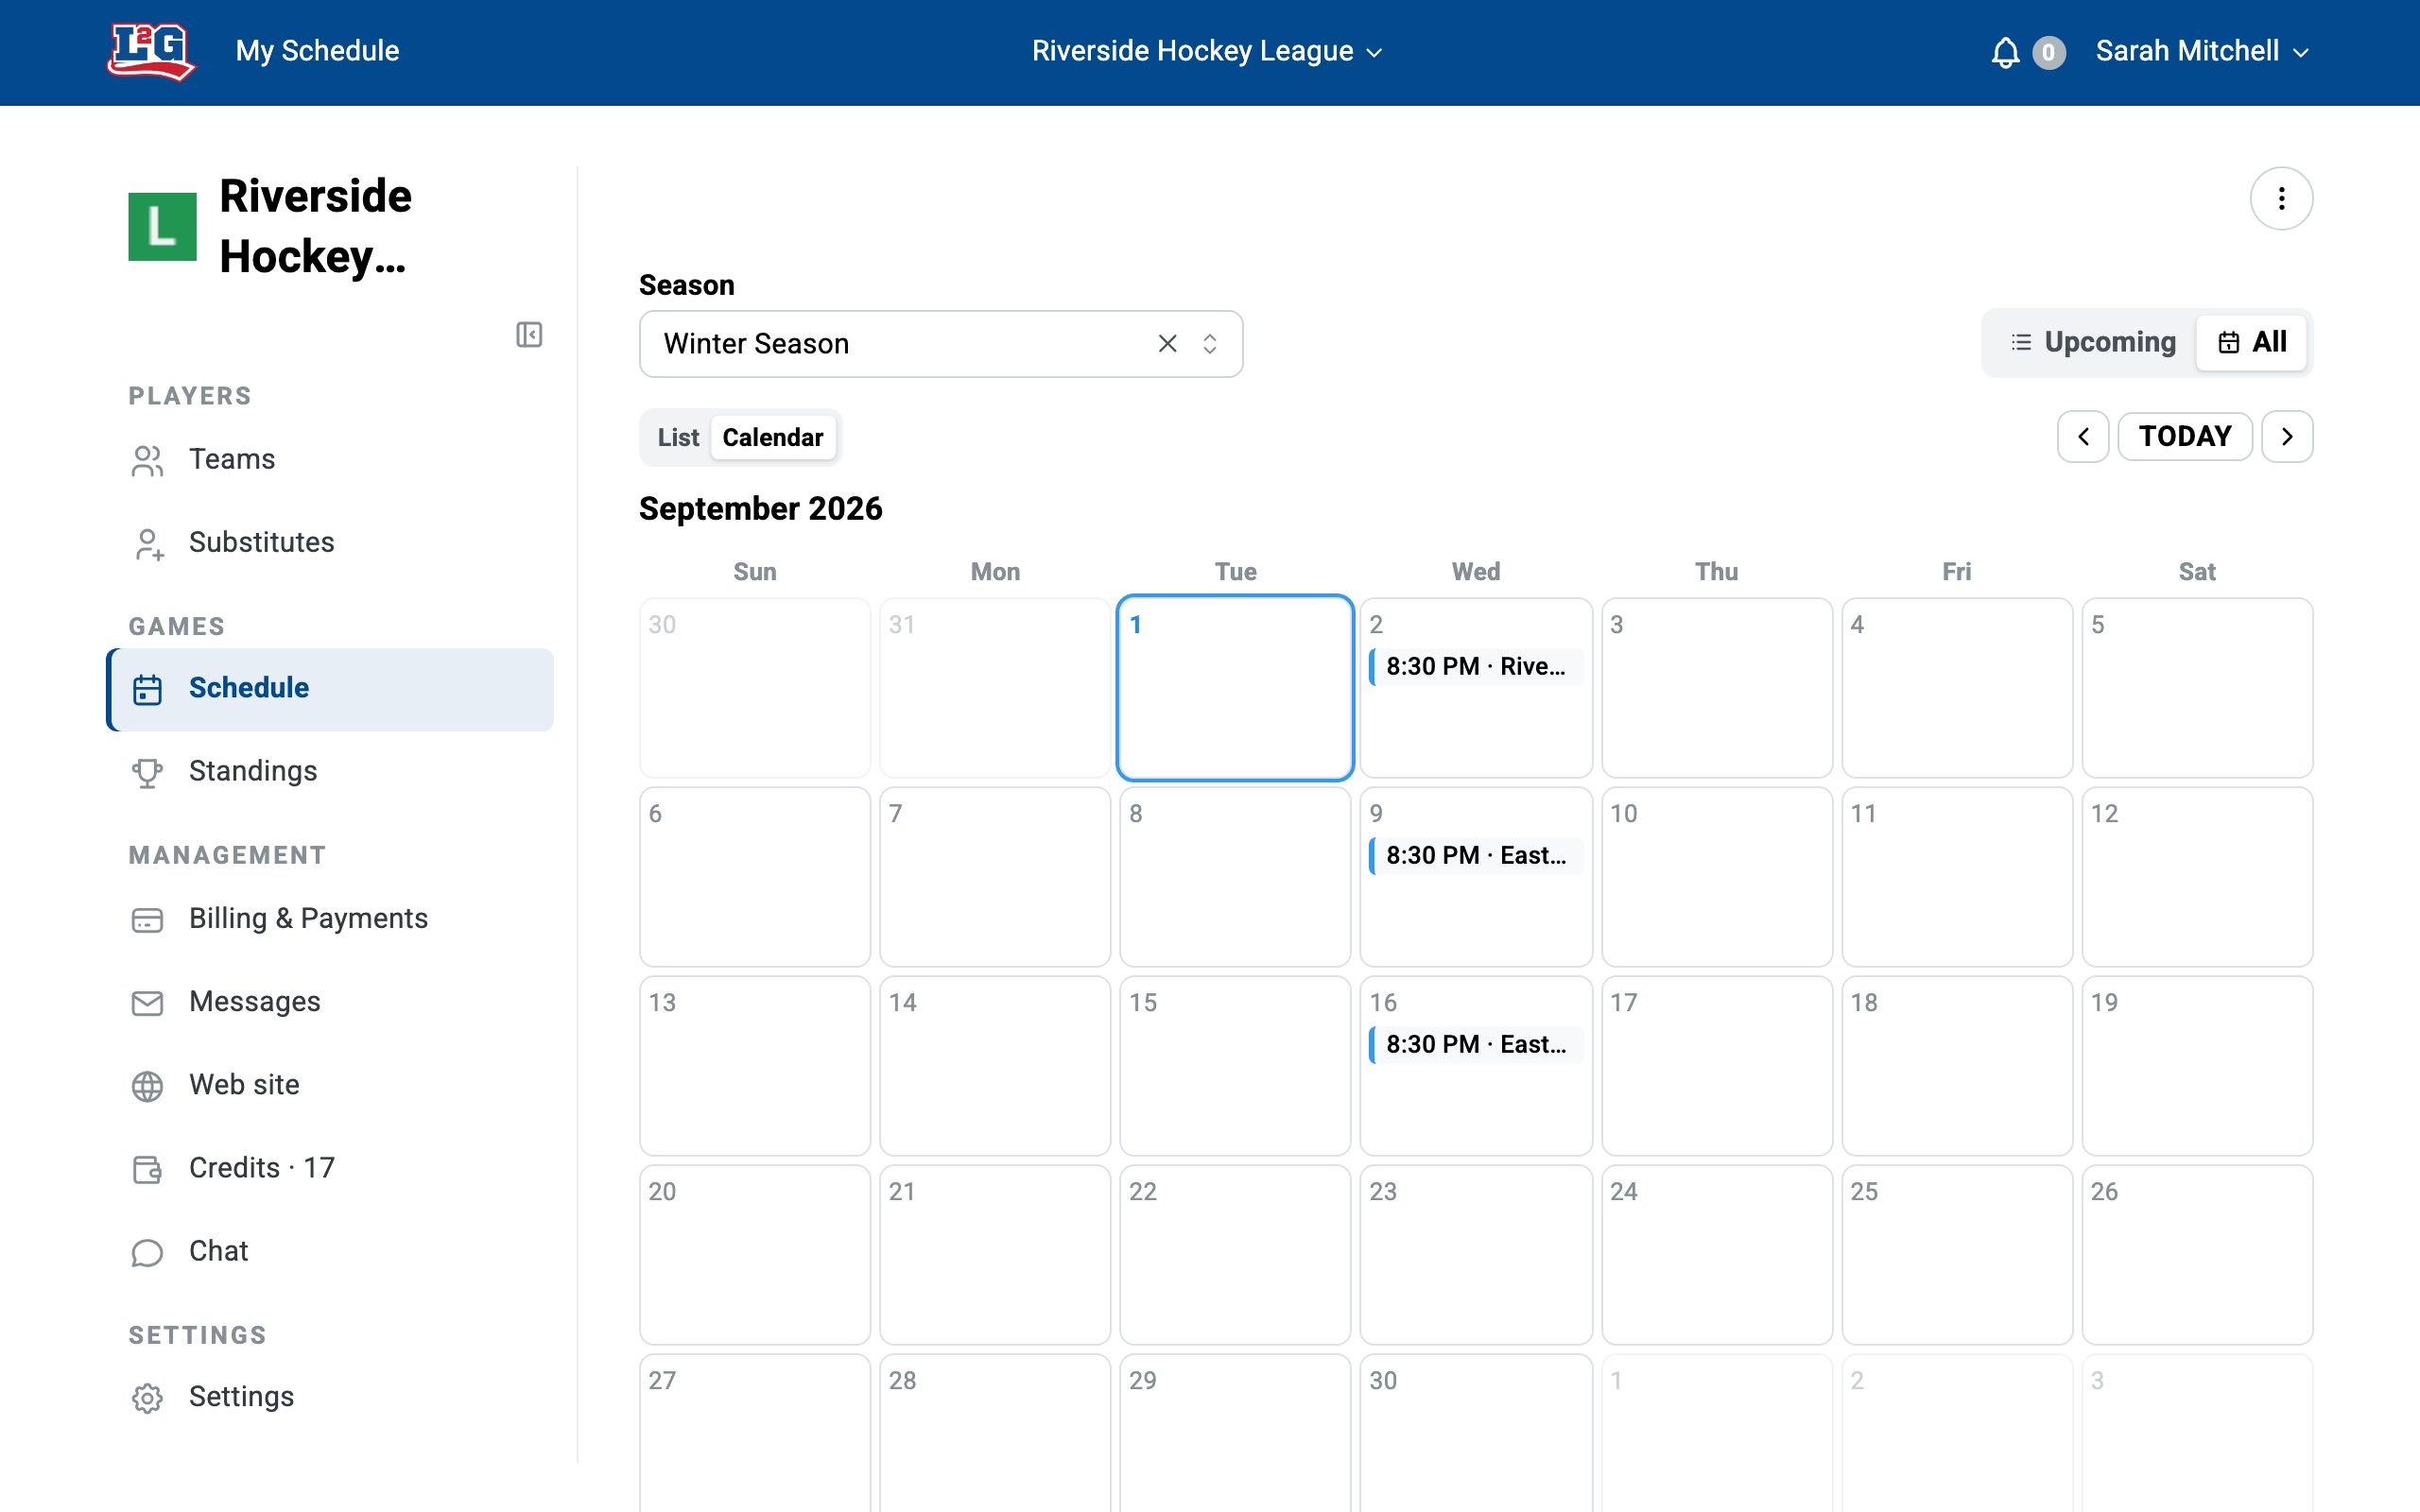
See schedule and calendar for repeating games, cancellations and the season filter.
7. Review your league settings (optional)
In the Settings tab you can add other managers, create seasons, configure your statistics, tune the substitute search and adjust automated notifications. You can also set up a public league website.
Your players can use the free mobile app to see their schedule and declare absences.
Questions? Contact us at info@league2go.com.